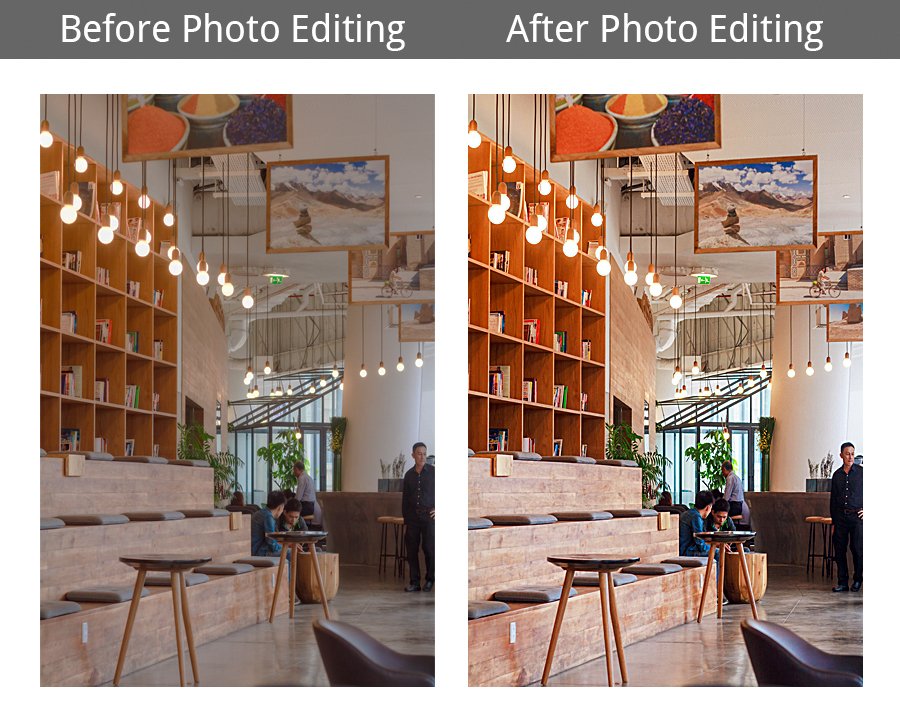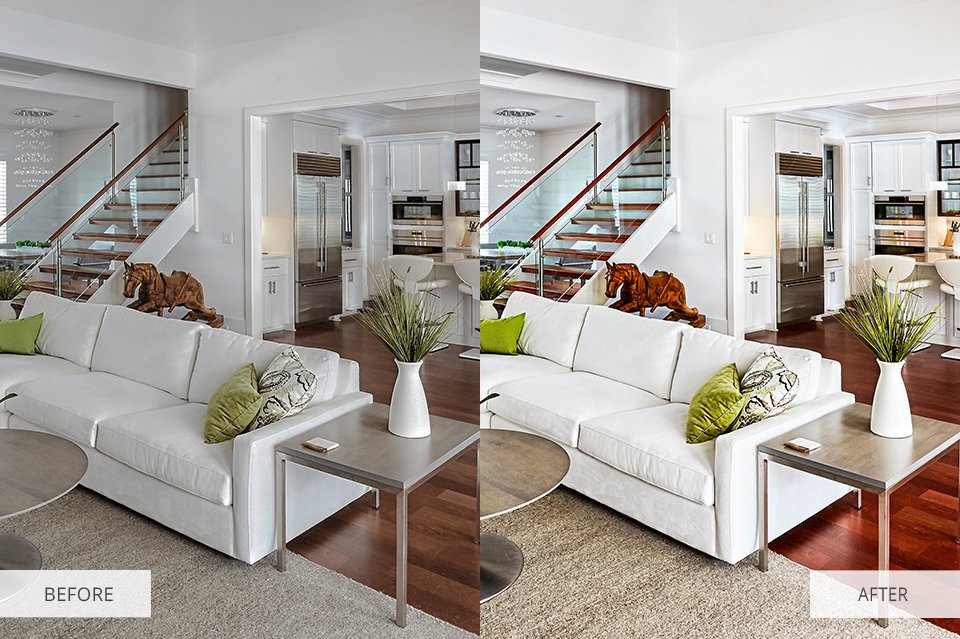
Interior photography needs adequate post-processing to bring out the best attributes of one’s images. Editing in Adobe Photoshop and Lightroom aids in the enhancement of lighting and color correcting, as well as detailing work for the purpose of giving the photo a clean, finished look. This guide provides interior photography editing tips that are worthwhile. With editing in mind, shooting techniques. Before diving into post-processing, shooting high-quality images should be undertaken. Use a tripod to avoid introducing any blur. Shoot in RAW format for edit flexibility. Use exposure bracketing for proper exposure. Keep vertical lines straight, using a tilt-shift lens or perspective correction.
- Basic Adjustments in Adobe Lightroom Import and Organize. With the Library Module in Lightroom, import and organize them easily. Apply some relevant keywords and metadata for categorization.
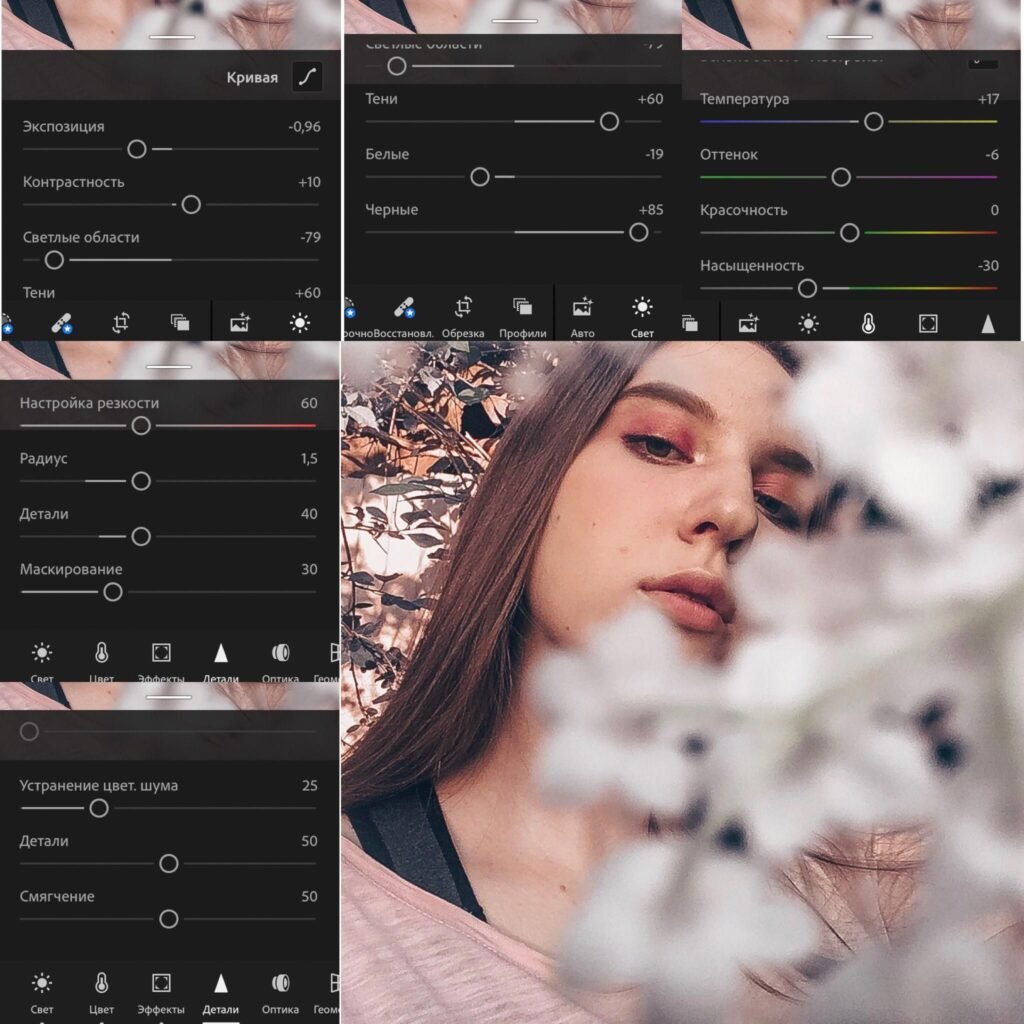
- White Balance Correction. Use the White Balance Selector(eyedropper) to get rid of any color casts. Adjust the Temperature and Tint sliders to ensure color accuracy.
- Adjusting Exposure and Contrast. If the image is too dark, increase Exposure slightly. Enhance the contrast for some depth.
- Highlight and Shadow sliders balance the light distribution. Tone Refinements Between Curves and HSL. Use the Tone Curve for refining brightness and Contrast.
- Adjustment of Hue , Saturation, and Luminance to Balance Colors and Remove Unwanted Tones. Lens Corrections and Geometry Adjustments Enable Lens Correction that removes distortion and chromatic aberration.
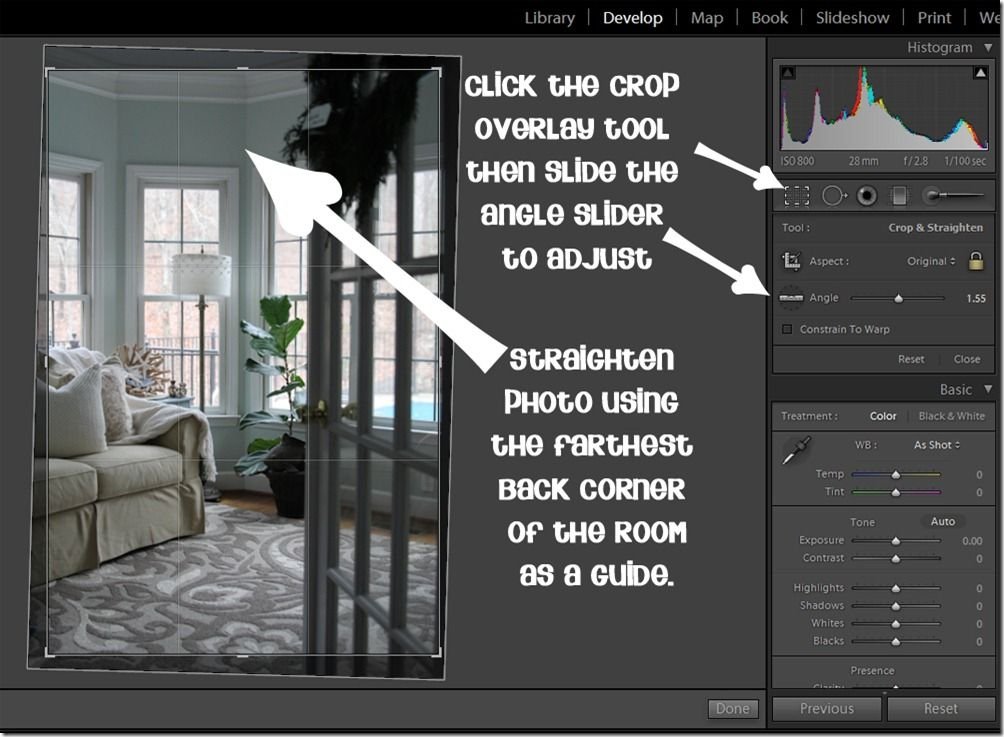
- Use Transform Tools (Auto, Guided, Vertical) to correct perspective distortions. Advanced Editing in Adobe Photoshop.
- Once the basic adjustments in Lightroom are corrected, one can fine-tune the details in Photoshop. Removal of Distractions. Use the Clone Stamp Tool and Content-Aware Fill to remove unwanted objects from the image.
- The Patch Tool blends textures seamlessly. Bringing Textures and Details to Life. Apply the High Pass filter (Filter> Other> High Pass) to sharp fine details.
- Use dodge and burn to emphasize highlights and darken shadows. Color Grading and Enhancement of Mood. By using Selective Colour Adjustments, specific hues can be fine-tuned. Gradient maps are also used for creative color toning.
- The soft glow can be created by applying a low-opacity Radial Gradient. Increase the brightness slightly on the windows. Exporting & Final Touches Resize for use, either as web or print. Output sharpening, by medium, is applied.
- Export as JPEG for web or TIFF for high-quality prints with the appropriate resolution.
Interior Photography Editing Tips: Photoshop & Lightroom
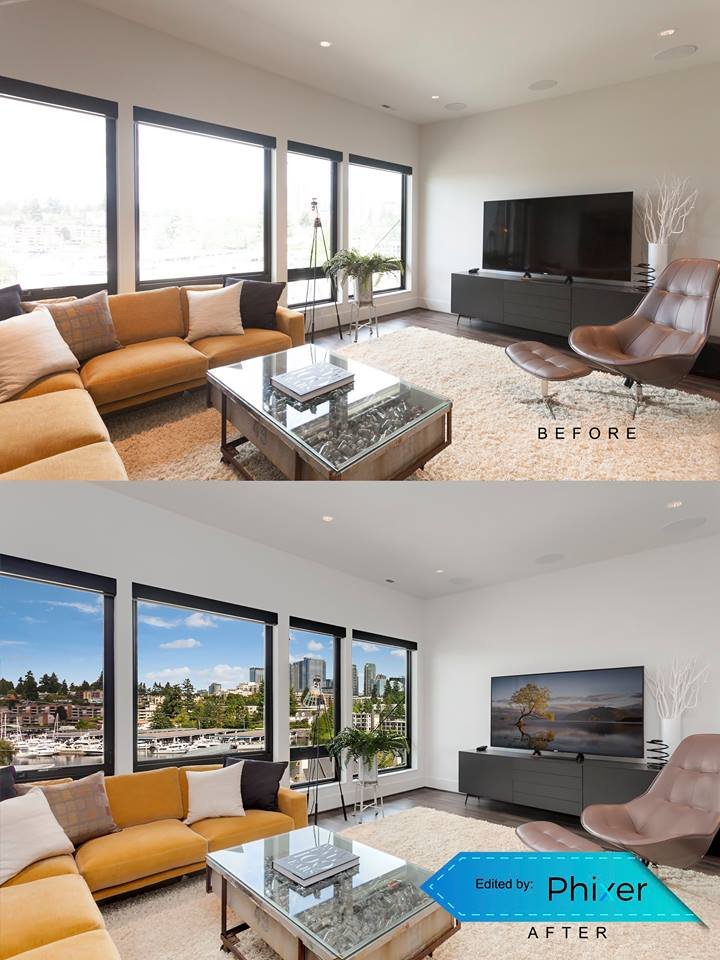
Ambiguous or reverse-sense interior photos taken with telephoto lens of dirty corner hint to restoration of interments. “This big guide gives the editor interior photography editing techniques to add professional beauty and character to the images that might be for used mutual designs by this aim including real estate or architectural.” Editing helps to:
- Correct exposure and white balance
- Remove unwanted elements
- Improve color accuracy
- Enhance textures and details
- Maintain a natural yet polished look
Lightroom Editing Tips for Interior Photography
1. Importing and Organizing
- Use collections and folders to organize your images.
- Apply keywords for easy searching.
- Use star ratings or color labels to sort your best shots.
2. Correcting White Balance
- Interior lighting can cause warm or cool color casts.
- Select a neutral area with the White Balance Selector (Eyedropper tool).
- Adjust the temperature and tint sliders for natural color balance.
3. Exposure and Contrast Adjustments
- Increase exposure to brighten dark areas.
- Adjust contrast for depth and clarity.
- Use the highlights and shadows sliders to balance light and dark regions.
4. Color Corrections and Vibrancy
- Slightly increase the vibrance to brighten the already vibrant colors without going overboard.
- Adjust colors more precisely with HSL. Too much saturation should be avoided to not to lose the natural aspect of photographs.
5. Lens Corrections and Perspective Fixing
- Enable Lens Correction to remove distortions.
- Use Transform > Guided Upright to straighten the image along vertical and horizontal lines.
- Adjust vertical perspective for proper alignment.
6. Sharpening and Noise Reduction
- Apply sharpening to enhance details.
- Use masking to sharpen only the necessary areas.
- Reduce noise in shadows and darker regions for a clean look.
7. Cropping and Composition Refinements
- Crop the image to refine the framing.
- Use the rule of thirds for balanced compositions.
8. Adding Local Adjustments
- Use the Adjustment Brush to brighten specific areas.
- Apply radial and graduated filters to add subtle lighting effects.
9. Final Touches and Exporting
- Apply a slight vignette for depth.
- Check for color consistency across images.
- Export in high resolution with appropriate sharpening.
Photoshop Editing Tips for Interior Photography

1. Advanced Perspective Corrections
- Use Edit > Transform > Warp for complex perspective adjustments.
- Apply Perspective Crop Tool for straightening edges.
2. Removing Unwanted Elements
- Use the Clone Stamp Tool to remove any minor distractions. Utilize Content-Aware Fill to repair the background seamlessly.
- Use Patch Tool for larger areas needing correction.
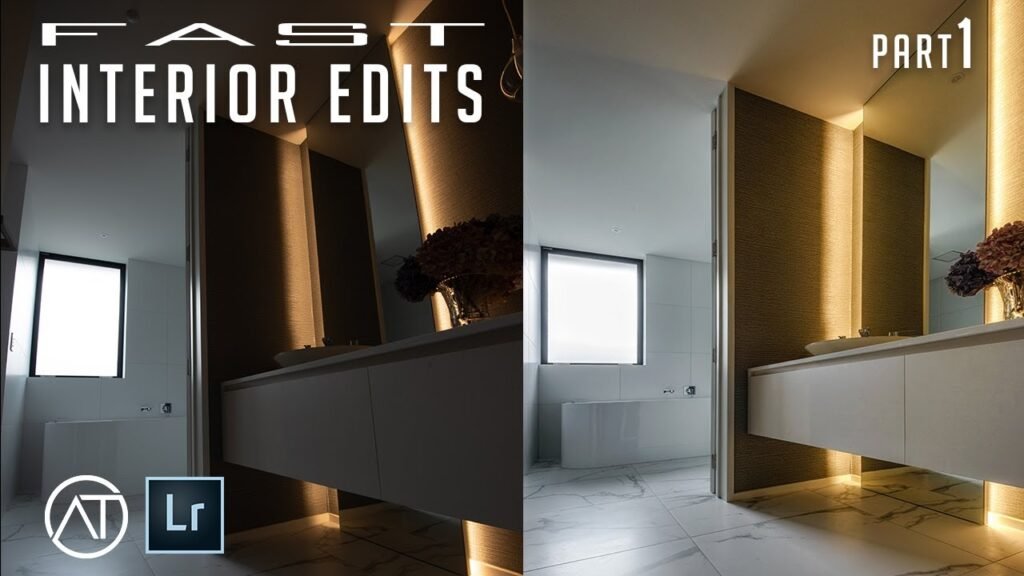
3. Enhancing Lighting and Shadows
- Add a curves adjustment layer to tweak highlights and shadows. Dodge and burn to emphasize separate portions.
- Apply a soft light layer to simulate natural lighting effects.
4. Refining Textures and Details
- Use High Pass Filter to enhance textures.
- Apply frequency separation for precise texture control.
5. Color Grading and Harmonization
- Use Selective Color Adjustments to balance hues.
- Apply a Gradient Map for professional color grading.
- Blend colors for a cohesive look using Color Balance.
6. Final Retouching and Exporting
- Double-check for distortions and inconsistencies.
- Save in TIFF or PSD for high-quality archives.
- Export in JPEG for web and client delivery.
Bonus Tips for Professional Interior Editing
- Shoot in RAW for the most editing flexibility possible. Use natural light whenever possible; it creates softer shadows.
- Keep edits realistic to maintain authenticity.
- Consider batch processing in Lightroom for efficiency.
HDR means going into some form of blending, high dynamic range scenes-wise. Some Lightroom and Photoshop techniques will really give added polish to a professional quality to your interior photography.
Conclusion
The combination of Lightroom and Photoshop techniques when editing interior photography is a must master. With these steps, you can brighten up your photos, correct distortions, and refine colors for a final image that is very striking to the eye. Try out different settings and styles to develop an editing workflow that is as unique as you.